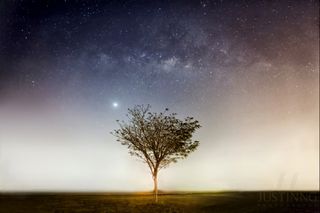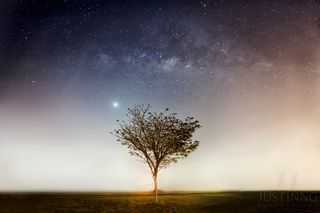
Spotting the Milky Way on dark, cloudless nights can be a challenge for anyone, but trying to see it through the haze of light pollution in a crowded city is nearly impossible.
Singapore, in particular, is one of the most light-polluted cities in the world, however, that doesn't mean astrophotographers should give up hope of revealing the stunning clouds of the Milky Way above the bright city. There are some tips and tricks to use that could make those elusive photos a reality.
The journey to produce believable, never-before-seen Milky Way images from Singapore or other light-polluted locations can be arduous but rewarding at the same time. As light pollution continues to be an ever-growing problem in major cities, your images may help to remind people around the world of the importance of preserving the beauty of the night sky. [Photo Tutorial: Step-By-Step Guide to Revealing the Milky Way (Gallery)]
Many tutorials explaining how to unveil the Milky Way in city photos online today do not account for Singapore's extreme light. Therefore, astrophotographers need to learn how to do more in post-processing to unveil the elusive Milky Way from much brighter locations.
Here are some of the skills you will need to reveal the Milky Way above a light-polluted part of the world:
Shoot during the wee hours
The amount of light pollution is usually low a few hours before dawn. Take advantage of the darker skies near midnight or during the wee hours of the morning.

Locate the galactic center of the Milky Way
Searching for the galactic center of the Milky Way can be a daunting task for those who are just starting out in astrophotography. Our galaxy's center is located between the constellations Scorpio and Sagittarius. If you need a little extra guidance, you can use a simple astronomy app that will guide you to the center of the galaxy. You can download the app here: http://www.justinngphoto.com/app
Get the Space.com Newsletter
Breaking space news, the latest updates on rocket launches, skywatching events and more!
Determine the degree of light pollution and sky glow
Take some test shots to determine the degree of light pollution and sky glow at your location. If the sky glow is around 20 degrees above the horizon, you might want to wait until the altitude of the Milky Way's center reaches around 35 to 40 degrees before you start hitting the shutter. (Your closed fist held to the sky at arm's length is about the equivalent of 10 degrees.)
Collect the maximum amount of light
By pushing your histogram to the right before clipping occurs, you are acquiring as many signals as possible from your camera sensor. This technique, known as Expose To The Right (ETTR), does have its limitations. It won't work in most parts of Singapore without an effective post-processing workflow.

Post-processing workflow
You need to normalize the ETTR image in Photoshop or any photo-editing software before you apply your workflow to bring out the details of the Milky Way's clouds. The workflow will become more complex if the images are taken from a much brighter location.
Learn more post-processing tips using this step-by-step photo tutorial developed by Ng. Follow us @Spacedotcom, Facebook and Google+. Original article on Space.com.
Join our Space Forums to keep talking space on the latest missions, night sky and more! And if you have a news tip, correction or comment, let us know at: community@space.com.
